 中文(繁體字)
 English (international)
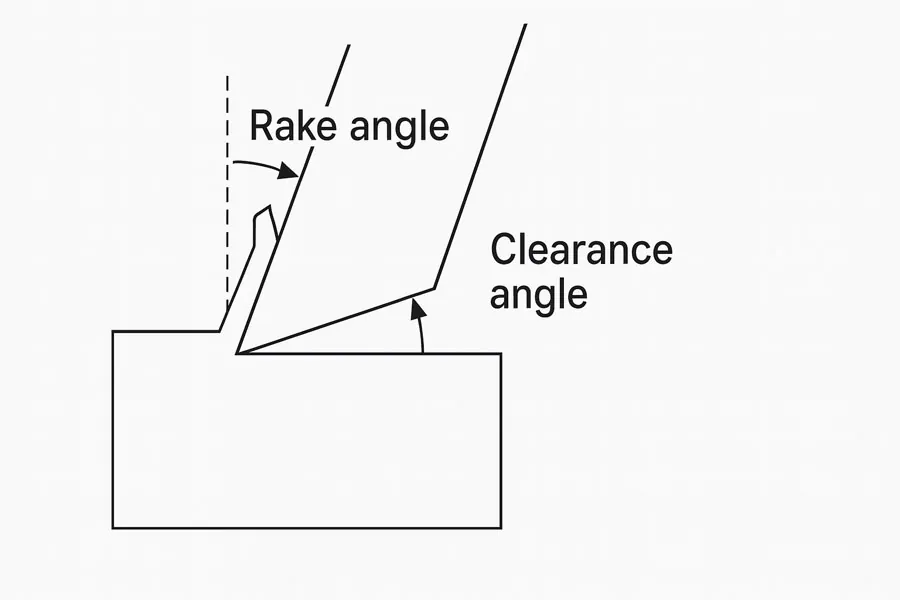
Definition of Relief Angle
Why It Matters for Band Saw and Mill Drill Machines
Related Terms
Rake Angle Clearance Angle Helix Angle Cutting Edge Geometry Back Angle Chip LoadFAQ
How do you measure the relief angle on a twist drill or end mill?
To measure relief angle, place the tool in a microscope or protractor jig. Align the tool’s axis horizontally, then rotate the tool until the flank face touches the protractor blade. The angle between the blade and the tool’s axis is the relief angle. For end mills, you measure behind the cutting edge on the side relief face. Consistent measurement helps you verify manufacturer specs or evaluate regrinding results to maintain cutting performance.
What relief angle values are typical for end mills and drill bits?
Typical relief angles vary by material and tool type. For general-purpose HSS end mills, you’ll see 8° to 12°. Carbide tools often use 5° to 10° because of their higher wear resistance. Twist drills usually range from 12° to 15° to balance strength with clearance. Harder materials require smaller relief angles to maintain edge strength, while softer materials allow larger angles for cleaner cuts. Always match relief angles to your spindle speed and feed rate.
How does relief angle affect tool life and cutting performance?
A correct relief angle reduces flank wear by minimizing contact between the tool body and the workpiece. Less friction means lower cutting temperatures and slower wear progression. You’ll get longer intervals between regrinds and see improved dimensional accuracy. On the other hand, too small an angle causes rubbing, excessive heat, and accelerated wear. Too large an angle weakens the cutting edge, leading to chipping. Balancing relief angle optimizes both tool life and part quality.