 中文(繁體字)
 English (international)
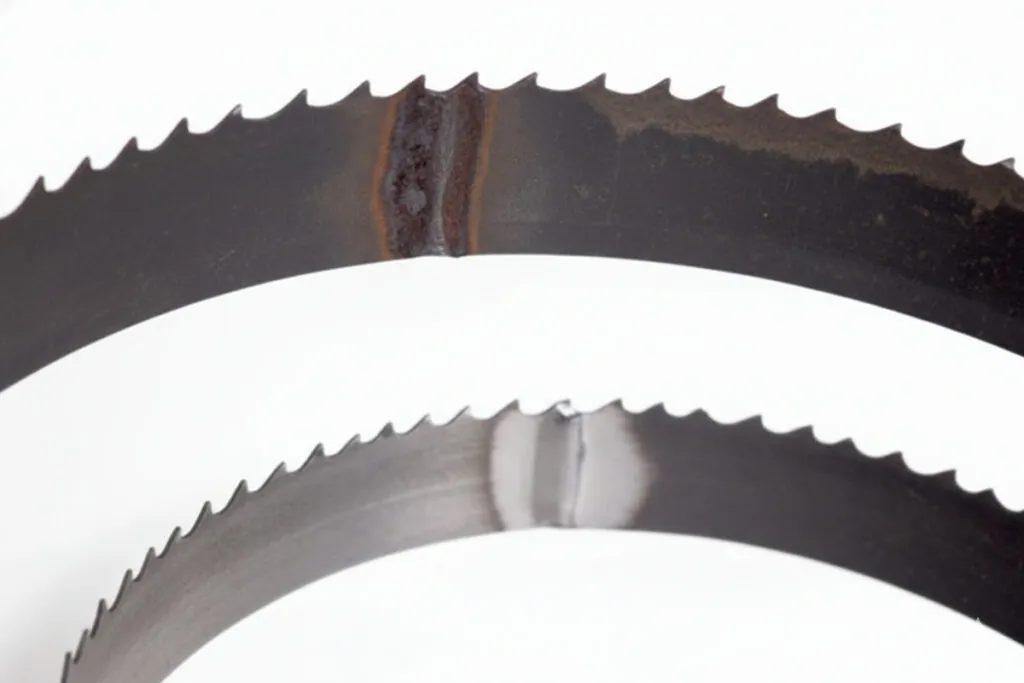
Definition of Weld Joint
Why It Matters for Band Saw and Mill Drill Machines
Related Terms
Blade Tension Blade Deflection Blade Tracking Blade Break-In Carbide Blade Inserts Hook ToothFAQ
What are the critical parameters for achieving a strong band saw weld joint?
Creating a strong band saw weld joint requires precise control of welding parameters and careful preparation of blade ends. Begin by cutting blade ends square using a cutoff wheel or shear, ensuring clean edges free from distortion or burrs. Align the ends in the welding fixture with perfect registration; any offset creates a weak joint and tracking problems. Set welding current based on blade thickness and material; typical carbon steel blades require 4000-6000 amps per square inch of cross-section. Apply pressure progressively as material reaches forging temperature, forcing contamination from the joint interface. Welding duration should be just sufficient to achieve full-width fusion without excessive heating that expands the heat-affected zone. After welding, inspect the band saw weld joint for complete fusion across the entire width; any voids or cold areas indicate inadequate parameters requiring adjustment. Grind the joint flush with blade surfaces, removing oxide scale and excess upset material while maintaining original blade width and thickness dimensions.
How do you properly anneal and temper a band saw weld joint after welding?
Post-weld heat treatment of the band saw weld joint follows a specific sequence to relieve stress and restore blade properties. After initial grinding to remove heavy upset material, anneal the weld zone by heating to 1200-1400 degrees Fahrenheit using a focused flame or induction coil, maintaining temperature for 30-60 seconds depending on blade thickness. This thermal cycle reduces residual stresses from rapid cooling during welding and softens the hardened heat-affected zone. Allow the blade to air cool completely; rapid cooling defeats annealing purpose. Once cooled, finish-grind the band saw weld joint to final dimensions, achieving smooth transitions and surface finish matching the base blade. Finally, temper the weld zone by reheating to 400-600 degrees Fahrenheit to restore appropriate hardness for cutting. Proper tempering produces a weld joint with 45-50 Rockwell C hardness, similar to the blade body. Test weld quality by flexing the blade repeatedly through 90-degree bends; the joint should withstand multiple cycles without cracking or showing distress signs.
What inspection methods verify band saw weld joint quality before blade installation?
Comprehensive band saw weld joint inspection combines visual examination with mechanical testing to ensure reliability. Visually inspect the joint under good lighting for complete fusion across the blade width, looking for voids, cracks, or incomplete bonding visible as dark lines in the weld. Check surface grinding quality; the joint should present smooth transitions without steps, ridges, or valleys that exceed 0.002 inches. Measure blade width and thickness at the weld; dimensions should match base blade specifications within 0.005 inches to prevent guide interference. Perform a flex test by bending the blade manually through a 90-degree arc with the weld at the apex; the joint should flex smoothly without cracking, separating, or showing visible distortion. For production operations, conduct a tension test by mounting the blade on the saw, applying normal operating tension, and running for 5-10 minutes at moderate speed without load. A quality band saw weld joint will track properly and produce no unusual vibration or noise during this break-in period. Any failures indicate substandard welds requiring rejection and rewelding.