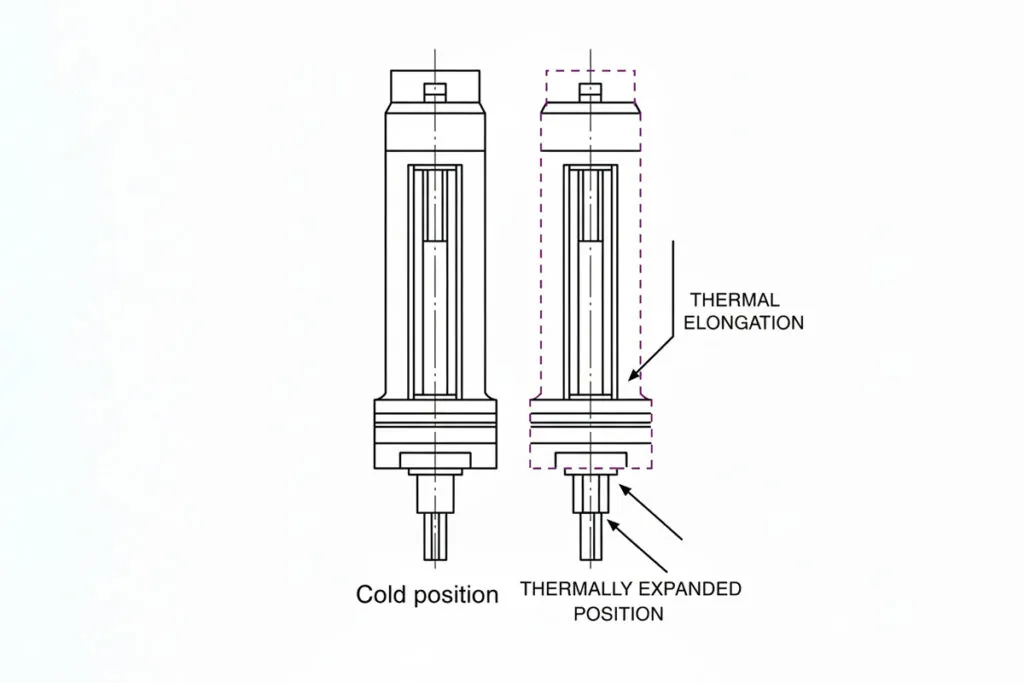
Definition of Thermal Growth Compensation
Why It Matters for Band Saw and Mill Drill Machines
FAQ
How do mill drill machine thermal growth compensation systems differentiate between spindle growth and structural expansion during extended production runs?
Mill drill machine thermal growth compensation systems differentiate growth sources through strategic temperature sensor placement and thermal modeling that isolates component-specific expansion characteristics. Spindle thermal growth occurs rapidly within the first 15-20 minutes of operation, primarily affecting Z-axis positioning as the spindle nose extends due to bearing friction heat and cutting heat transfer. Sensors mounted at the spindle housing and bearing locations detect this localized temperature rise and trigger compensation adjustments of 0.002-0.008 inches depending on spindle speed and load. Structural thermal expansion develops more gradually over 60-120 minutes as the machine base, column, and table absorb ambient heat and cutting heat conducted through the workpiece, affecting both Z-axis and X-Y positioning. Temperature sensors distributed across the machine frame enable multi-point thermal gradient mapping that predicts structural growth patterns distinct from spindle effects. The compensation algorithm applies Z-axis corrections dominated by spindle growth during initial warm-up, then incorporates increasing structural compensation as thermal equilibrium approaches. Advanced systems update compensation values every 10-30 seconds based on real-time sensor data, achieving total positioning accuracy within 0.0015 inches throughout production cycles.
What are the accuracy trade-offs between predictive thermal models versus real-time sensor-based mill drill machine thermal growth compensation?
Predictive thermal models for mill drill machine thermal growth compensation offer faster response and lower implementation costs but sacrifice accuracy compared to real-time sensor systems. Predictive approaches use pre-characterized thermal growth curves based on spindle speed, cutting time, and ambient temperature to estimate expansion without direct measurement, typically achieving compensation accuracy of 60-75% error reduction. These models perform best in stable environmental conditions and consistent machining cycles, but accuracy degrades by 20-30% when ambient temperature varies beyond ±5°F or cutting loads change significantly from modeled conditions. Real-time sensor-based compensation measures actual component temperatures at multiple locations, providing direct feedback for 80-90% error reduction across varying conditions. However, sensor systems require careful calibration, maintenance, and protection from coolant and chips, with installation costs 3-5 times higher than predictive modeling. Sensor lag time of 15-60 seconds between temperature change and compensation update can introduce temporary positioning errors during rapid thermal transients. Hybrid approaches combining predictive models with periodic sensor calibration offer balanced performance, using sensors to update model parameters rather than direct real-time compensation, achieving 75-85% error reduction at moderate cost while maintaining robustness against sensor failures.
Which mill drill machine thermal growth compensation verification procedures ensure maintained accuracy between calibration cycles in production settings?
Effective verification of mill drill machine thermal growth compensation in production requires periodic artifact measurement protocols that validate actual positioning accuracy without disrupting workflow. A precision ground calibration artifact with known dimensions at reference temperature (typically 68°F) is measured at the start of each shift when the machine is cold, establishing baseline dimensions. The same artifact is re-measured after 2-4 hours of continuous operation when thermal equilibrium is reached, comparing actual dimensions to expected compensated values. Deviations exceeding 0.002 inches indicate compensation degradation requiring recalibration. Temperature sensor validation involves comparing sensor readings against calibrated thermocouples placed at identical locations, with sensor drift beyond ±2°F triggering replacement. Spindle growth verification uses a calibrated test indicator mounted in the spindle to measure Z-axis displacement against a fixed gage block as the spindle warms from cold start to operating temperature. The measured growth pattern is compared to the compensation curve, with differences greater than 15% indicating model update requirements. Production part measurements on first-piece and periodic mid-run inspections provide continuous accuracy feedback, with critical dimension trends plotted to detect gradual compensation performance degradation. These combined verification approaches maintain compensation effectiveness for 6-12 months between complete recalibration cycles while ensuring consistent part quality throughout production.

